Key Takeaways
- Turning off Lens Correction could enhance colour in iPhone images, however outcomes can fluctuate. Do this setting in Digital camera settings.
- Switching from ProRAW Max to HEIF Max can enhance picture high quality by including some processing. Experiment along with your digicam settings.
- Attempting totally different Photographic Kinds can heat up grey images. Choose a method within the Digital camera app or by the settings for a change.
Whereas scrolling through TikTok is probably not the answer to your entire tech issues, you’ll be able to study a stunning quantity from the remark sections of sure posts. A post from influencer Alix Earle complaining about how all her iPhone 15 images turned out grey and washed out garnered greater than 684,000 likes and greater than 1,700 feedback. And whereas a number of the feedback have been the usual banter, a lot of them have been from folks weighing in with options that they’d discovered to repair their very own washed out iPhone 15 images.
You won’t believe which music giant just returned to TikTok
Trace: It has a roster of A-list artists, together with Taylor Swift, and after controversially eradicating its music from TikTok, it is lastly coming again.
I attempted a few of them out to see if they might work for me, with various ranges of success.
I then fell down a little bit of a rabbit gap of TikTok comments looking for another helpful strategies buried beneath comparable movies, and I used to be stunned to study some ideas that I did not know. I attempted a few of them out to see if they might work for me, with various ranges of success. Listed below are six strategies for fixing grey iPhone images that I discovered in TikTok feedback.
1 Flip off Lens Correction
Did not make an enormous distinction for me, however some customers rave about it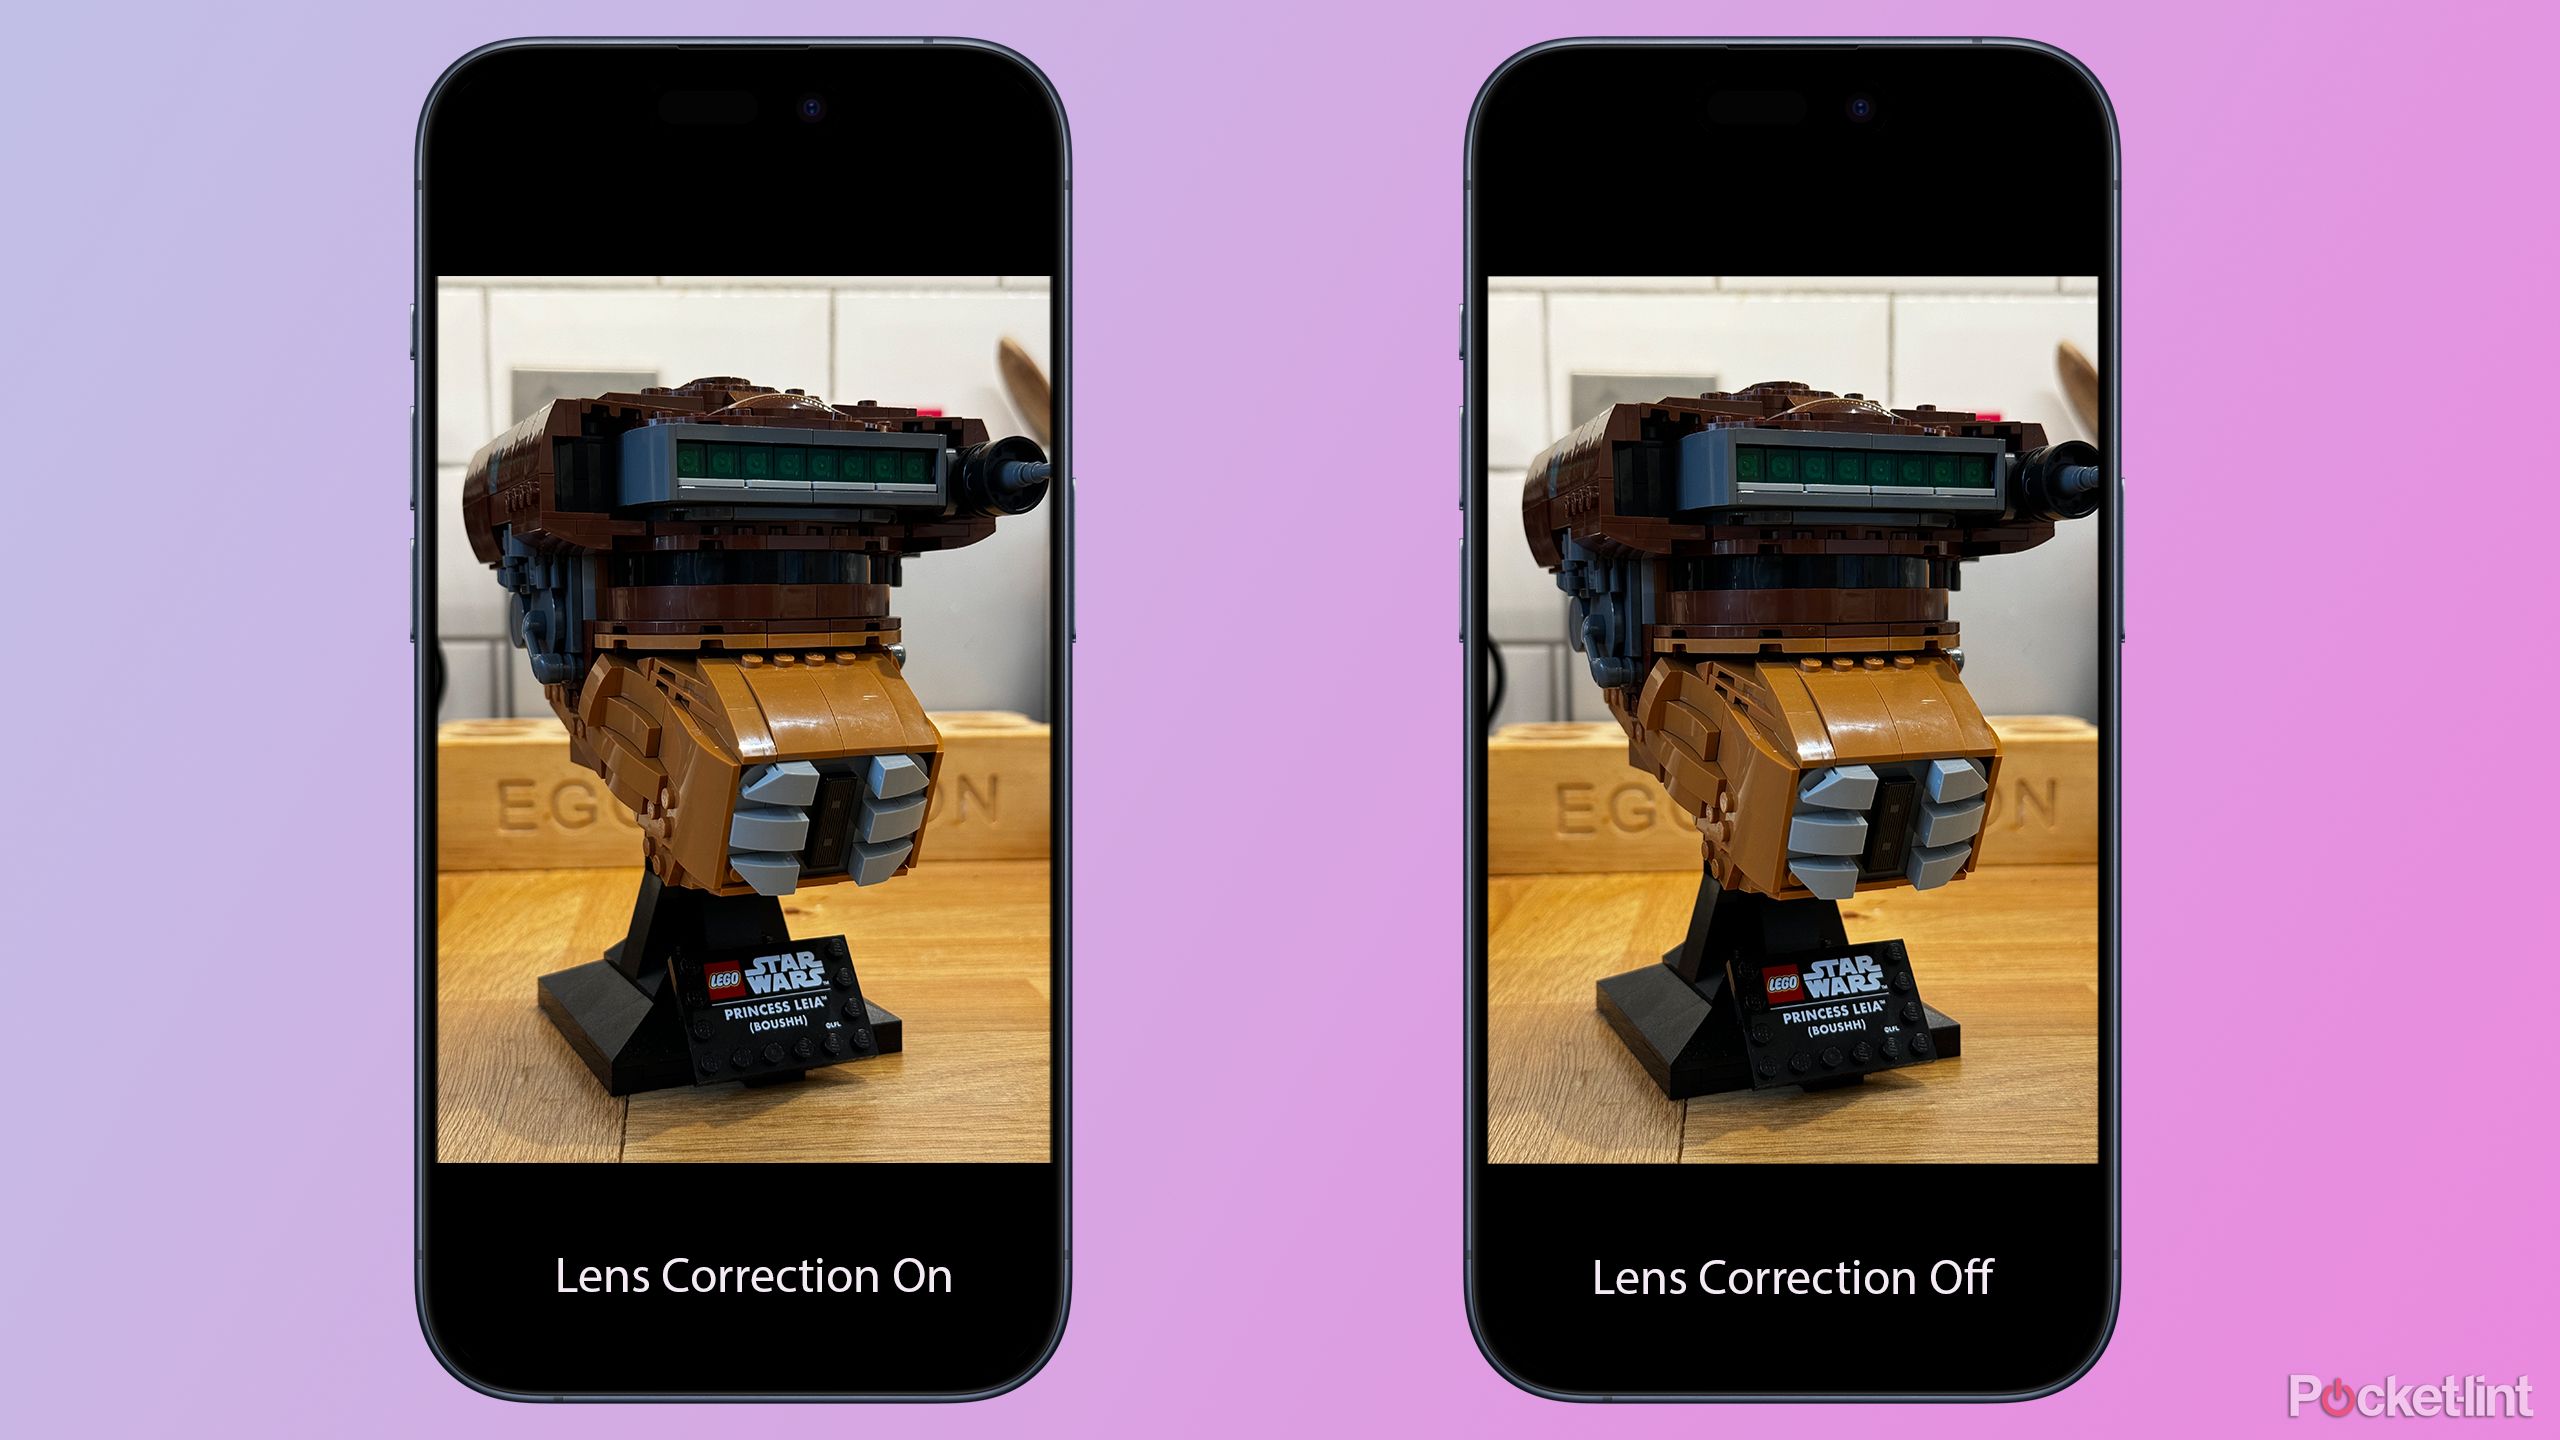
One of many high strategies for fixing gray-looking images on the iPhone 15 was to show off lens correction. This can be a technique that appeared to work for most of the different folks within the feedback — for images taken with each the entrance and rear cameras.
Lens correction is a strategy to right distortions brought on by digicam lenses.
Lens correction is a strategy to right distortions brought on by digicam lenses. In your iPhone, the form of the lens could make straight strains seem barely curved or give your photos a slight fish-eye look. Lens correction is a kind of hidden iPhone camera settings that fixes these points utilizing software program to right the picture.
As you’ll be able to see from the images above, altering this setting did not make a massively noticeable distinction to my photos. Nevertheless, some TikTok customers have stated that they discovered that turning lens correction off improved the colour of their images and stopped them from showing so grey, though that is purely anecdotal proof.
- Open the Settings app in your iPhone
- Scroll down and choose Digital camera
- Close to the underside of the web page, toggle Lens Correction off

As a pro photographer, these are my favorite iPhone camera apps
These are the apps I flip to once I need to get probably the most from my iPhone’s digicam.
2 Attempt turning off ProRAW Max
Taking pictures RAW might make some photos seem washed out

One other common suggestion associated to ProRAW Max, which captures your photos in RAW format at prime quality. This was the subject of the most well-liked remark thread beneath Alix Earle’s put up, but it surely was stuffed with contradictory strategies with some saying to show ProRAW on, and others suggesting that folks flip off ProRAW and use HEIF Max.
Taking pictures RAW means capturing minimally processed knowledge out of your digicam’s picture sensor. This lets you edit your images in apps akin to Lightroom, and make modifications to issues such because the white stability or publicity settings after the very fact, to get the precise end result that you really want.
Different codecs, akin to HEIF, carry out some processing of the picture in your iPhone, so the ensuing images can look much less washed out in your telephone than the RAW photos. HEIF Max is a format that takes 48MP photos however compresses them utilizing the HEIF format in order that they are much smaller than the equal RAW file.
It might make sense, then, that switching from ProRAW Max to HEIF Max ought to make your images look higher instantly after you have taken them, since they may have had some processing carried out on them. RAW photos will provide you with extra leeway in terms of modifying them later, however as they’re unprocessed in your digicam, they will usually look extra washed out.
I attempted it for myself — as proven within the picture above — and located that I received a extra washed out picture (proper) with ProRAW turned on. When it was toggled off, I discovered it produced a hotter picture (left).
Taking pictures with ProRAW off could not lead to the identical outcomes each time, and there are different components — like lighting — to think about, but it surely did work for myself and lots of TikTok customers.
ProRAW could produce photos that may look extra washed out, but it surely does have advantages if you wish to edit your images manually, since your picture is captured uncompressed. This comes with a serious draw back: A photograph saved in ProRAW Max takes up 15 occasions extra cupboard space than a photograph saved in HEIF Max format, so taking pictures on this mode can chew by your cupboard space.
Taking pictures in ProRAW mode can chew by your cupboard space.
These ProRAW choices are solely out there on the iPhone 15 Professional and iPhone 15 Professional Max, so you will not haven’t got to fret about this setting on an iPhone 15.
- Open the Settings app
- Choose Digital camera
- Faucet Codecs
- Toggle ProRAW & Decision Management on if it is not already
- Faucet Professional Default
- Choose HEIF Max (as much as 48MP)
- Once you’re utilizing the digicam app, toggle between HEIFMax and normal images by tapping the HEIF MAX icon on the high of the display screen

What is Apple ProRAW? How to shoot RAW images on iPhone (and why you’ll want to)
Have an iPhone Professional? Activate Apple ProRAW for extra modifying capabilities.
3 Flip off View Full HDR
A Images setting, not a Digital camera setting

One other suggestion that many customers stated appeared to work for them was to show off the View Full HDR settings within the Images app. This setting would not have an effect on how your images are captured, but it surely does change how they’re displayed in your iPhone. HDR is a fancy matter, and whereas turning this setting off could make some images look much less washed out, it is attainable that it might need the reverse impact in some contexts, so its positively value making an attempt it out to see what outcomes you get along with your explicit picture.
After I tried altering this setting, I discovered that there was little apparent distinction between the 2 photos, however that is positively one case the place not solely could your mileage fluctuate, but it surely’s additionally prone to fluctuate from picture to picture.
On older iPhones such because the iPhone 12, it is also attainable to show off automated HDR when capturing your images, however that is not attainable on the iPhone 15, for some purpose identified solely to Apple.
- Open Settings
- Faucet Images
- Scroll down and toggle View Full HDR off
What is Ultra HDR? Everything you need to know about the new imaging format
Google tries to take pictures into a complete new period with Extremely HDR. This is every little thing you must know in regards to the new picture format.
4 Flip off or choose Photographic Kinds
Set your personal default fashion

In case your images look totally different from what you’d count on, you will have inadvertently turned on a Photographic Style. These are digicam settings that you may choose which can apply to all of the images that you simply take. In case you discover your images are trying grey, you too can strive utilizing one among these Photographic Kinds to see if that improves issues. You possibly can choose Photographic Kinds within the Digital camera app, and within the Digital camera settings.
Deciding on a Photographic Model made a noticeable distinction to my images. As you’ll be able to see above, the picture taken with the Wealthy Distinction fashion is far hotter than the unique picture, so utilizing this or an identical Photographic Model might be a very good repair if your entire images appear to be washed out. As soon as once more, nonetheless, your mileage could fluctuate.
- To pick a Photographic Model within the Digital camera app, faucet the arrow on the high of the display screen
- Faucet the Photographic Model icon between the Reside Images and Side Ratio icons
- Scroll left to pick out a Photographic Model
- You possibly can edit the Photographic Model by tapping the Tone and Heat values and altering them
- To pick a Photographic Model by the settings, open the Settings app and choose Digital camera
- Scroll down and faucet Photographic Kinds
- Swipe left to view totally different types and faucet the Use button to pick out one

How I take astrophotography with my phone and 4 gadgets that help
Capturing the evening sky with a telephone might sound unattainable, however there are just a few methods that may make it occur. Right here, we current our skilled insights.
5 Swipe as an alternative of faucet
A fast strategy to take away any digicam settings

In case you are utilizing Photographic Kinds, there could also be occasions if you rapidly need to take a photograph with out the Photographic Model utilized. One other TikTok feedback hack I realized is that it is attainable to take action by swiping as an alternative of tapping.
As a substitute of tapping the Digital camera button to take a photograph, swipe it rapidly to the left after which launch. Swiping left begins the Burst mode, however should you launch right away you will solely take one picture, and it will not use any of your present digicam settings. The Photographic Model will not be utilized.
As a pro photographer, these are my favorite iPhone camera apps
These are the apps I flip to once I need to get probably the most from my iPhone’s digicam.
6 Apply an edit to images already in your digicam roll
Save time by pasting your edits to different images

After going by a TikTok rabbit gap, I used to be then result in a Reddit dialogue put up and located this game-changing trick. Altering the settings to cease your iPhone 15 images from being grey is all effectively and good, however what about all these grey images you have already received on in your Digital camera Roll?
You possibly can edit your iPhone photos and alter a complete vary of settings from the publicity to the saturation, however should you discover a set of edits that flip your picture from grey to perfection, you have then received to use them to your entire different grey images, and if in case you have a number of them, that might take without end.
Fortunately, there is a strategy to copy an edit from one picture and apply it to as many others as you want, so you’ll be able to repair all of your grey images without delay.
- Choose any picture you need to edit
- Faucet Edit within the high right-hand nook
- Swipe by the modifying choices and drag the slider left or proper to alter the values
- Repeat till you are pleased with the look of your picture
- Faucet the Three Dots icon within the top-right of the display screen and choose Copy Edits
- Return to the principle Digital camera Roll and faucet Choose on the high of the display screen
- Faucet all of the images that you simply need to apply the identical edits to
- Faucet the Three Dots icon within the backside proper of the display screen
- Choose Paste Edits
- The identical settings will likely be utilized to the entire chosen images

My 5 must-try Photoshop tips to edit photos in 5 minutes or less
Photoshop is a robust modifying device but it surely’s straightforward to get misplaced in all of the totally different instruments. Listed below are 5 ideas for rapidly modifying your photos.
Trending Merchandise